Monthly Archives: July

Introducing iSearch, A Search Page Optimized For The iPhone

I hacked a search page optimized for the iPhone. It uses the Yahoo! Search API and bits of Joe Hewitt’s iUI library. The address is:

Developing a web application for the iPhone is actually easier than traditional web development because of the fact that you are designing for a specific browser (Safari) running on a specific device with a known resolution (320 x 480)

I hope you’ll find this page useful. Comments and constructive criticism are welcome as always!


Exposing Extension Functionality to Web-Page Javascript

In this article, I describe how to implement a scriptable XPCOM Component. This type of component exposes some extra functionality to untrusted web-page JavaScript running inside a Gecko-based browser such as Firefox. The implementation itself will be done in JavaScript.


Before we start

First of all, you will need to download a recent version of the Mozilla source code. The Mozilla source code can be obtained either by downloading a source archive, or by using a CVS (source control) client. For our project, downloading a source archive is recommended, but if you wish to go down the CVS road, you should read this MDC article first. In my case, I simply downloaded a tarball of the Firefox 2.0.0.5 source code. Untar it using

tar xjfv <source-file.tar.bz2>

XPCOM uses its own variant of the CORBA OMG Interface Definition Language (IDL) called XPIDL. You will need a special compiler to process your XPIDL files. You can build the compiler yourself (the source for the compiler is under mozilla/xpcom/typelib/xpidl). If you’re on Windows (XP or Vista), you can simply download a statically linked Windows binary here.

Define the component interface

Let’s define the interface of our component. I will not delve into details about the actual XPIDL syntax. You can find more information on this here. This interface resides in a file named nsSimple.idl. The GUID was generated using Microsoft’s GUIDGen.exe.

#include "nsISupports.idl"
[scriptable, uuid(B2A56E5E-CF18-4a8e-8EE9-CE228098516A)]
interface nsISimple : nsISupports {
    // Version string. Readonly!
    readonly attribute string version;
    // Dummy test function.
    string doSomething( in string value );
};

Compile the interface file

This file must be compiled using the XPIDL compiler using the following command line. This should generate a file name nsISimple.xpt.

xpidl -m typelib -w -v -I <path-to-mozilla-source>/mozilla/xpcom/base -o nsISimple nsISimple.idl

Interface implementation

Once you have successfuly created an interface file that publicly defines the component’s methods and attributes, the next step is to implement those methods and attributes in a separate source file named nsSimple.js. The nsSimple object implements the nsISimple interface of course, but also the nsISupports interface (because nsISimple inherits from it) and the nsIClassInfo interface (this is needed because we are writing a scriptable component).

Component registration and instantiation

The second half of the file nsSimple.js contains the code necessary for the component instantiation and automatic registration. This code is fairly generic and does not change much from one component to another.

Install the component and test it

Copy the two files nsISimple.xpt and nsSimple.js to

<path-to-your-firefox-install>/components/

and restart Firefox. Create a simple HTML file as follows:

<html>
  <head>
    <title>XPCOM test page</title>
  </head>
  <body>
    <script>
if (window.simpleObj) {
    alert(simpleObj.version);
    alert(simpleObj.doSomething("foo"));
}
    </script>
  </body>
</html>

and open it up in Firefox. You should see a couple of alerts.

Downloads

I put together a complete archive that contains all the necessary files.

YUI-based Image Cropper Widget

I wrote a YUI-based image cropper widget that allows you to easily select which region of an image you’d like to crop. This widget works on all A-grade browsers in both standards mode and quirks mode. Attached is a screenshot.

To instantiate the widget, include the following source files in your web page (requires YUI >= 2.3)


<!-- CSS -->
<link rel="stylesheet" type="text/css" href="image-cropper.css">
<!-- Dependencies -->
<script src="yahoo-dom-event.js"></script>
<script src="dragdrop-min.js"></script>
<!-- Image cropper source file -->
<script src="image-cropper-min.js"></script>

Then, place an image on your page:

<img src="myImage.jpg" id="myImageId">

Finally, instantiate the widget:

<script>
    var cropper = new YAHOO.widget.ImageCropper("myImageId");
</script>

You can then retrieve the geometry of the crop region by calling:

var region = cropper.getCropRegion();

This should work right out of the box. You can also pass an optional configuration object to the constructor to set the initial geometry of the crop region as well as a constraint on the ratio width / height. For more information, please refer to the documentation inline in the source code.

Here is a live demo of the image cropper widget. You can also download an archive containing all the necessary source code.

baju gamis terbaru

IE6, CSS Sprites and Alpha Transparency

Image slicing using CSS, also known as CSS sprites, is quickly becoming a very popular technique in web development as it can dramatically improve the performance of a site by reducing the number of HTTP requests (see this article for more information). Alpha transparency is also quickly becoming a favorite feature among web designers: nice transparent gradients, no more jagged edges, etc. What’s not to like?

The good news is that almost all browsers in the A-grade category support alpha transparency via the use of PNG. The bad news is that IE6 does not support alpha transparency natively. It requires the use of a filter involving the AlphaImageLoader activeX, which does not support background repeat or positioning, the heart of the traditional CSS sprites technique.

The traditional CSS sprites technique relies on the ability to control the background properties of an appropriately sized HTML element, masking out all but the needed part of the larger background image. I recently heard of another technique that instead relies on clipping. Here is the recipe:

  • Create a block element (a DIV for example)
  • Set its size to the same size as the large image used for the sprite.
  • Set its background image.
  • Clip it to show only a small portion of the sprite.
  • Finally, position it appropriately.

The following example masks all but a 50 x 50 px portion of the master image:

#myDiv {
   width:400px; height:300px;
   background:url(sprite.png);
   clip:rect(100px,250px,150px,100px);
   position:absolute;
}

Unlike the traditional CSS sprites technique, this new technique can be used with the AlphaImageLoader filter to create alpha transparent sprites on IE6. Simply replace the line:

background:url(sprite.png);

with:

filter:progid:DXImageTransform.Microsoft.AlphaImageLoader(
    src="sprite.png", sizingMethod="scale");

This technique does not offer any support for background repeat. However, if you only use patterns that can be stretched either horizontally or vertically, you can still use this technique. I put together a complete demo to illustrate this.

How to make a Bochs disk image

In this article, I try to synthesize several (incomplete or inaccurate) articles I’ve found on the Internet to guide you through the process of creating a disk image you may use with the Bochs emulator. The steps described below are intended for a GNU/Linux system and some of them require super user privileges. Also, you need to have GRUB installed on your system.

1. Create a disk image. Here, I create a file named disk.img, containing 10080 blocks (each block being 512 bytes, this will create a file that’s about 5MB)

$ dd if=/dev/zero of=disk.img count=10080

2. Use FDISK to create a partition table on the image file:

$ fdisk disk.img
   x     -> Extra functionality
   c 10  -> 10 cylinders
   h 16  -> 16 heads
   s 63  -> 63 sectors per track
   r     -> Return to main menu
   n     -> Create a new partition
   p     -> Primary
   1     -> Partition #1
   1     -> First cylinder
   10    -> Last cylinder
   a     -> Set bootable flag
   1     -> Partition number
   w     -> Write partition to disk

Note that you have to tell fdisk about the geometry of your disk, and that geometry has to match the size of the disk you created in step 1 (10 cylinders * 16 heads * 63 sectors per track = 10080 blocks). For an introduction on disk geometry, cylinders, heads and sectors, read this Wikipedia article.

Let’s take a quick look at the Partition Table in the Master Boot Record (See this Wikipedia article for a description of the structure of the partition table)

$ hexdump disk.img

The 16 bytes at offset 446 (0x1BE) are:

0180 0001 0f83 093f 003f 0000 2721 0000

Keep in mind that these values are stored using little-endian convention (see this Wikipedia article to find out more about the meaning of endianness in computer science). Also see this article to find out how the CHS values are computed.

Offset Description
0×00 0×80 means that this partition is bootable
0×01 0×000101 is the CHS address of the first sector in the partition:
S = 0×01 = 1
H = 0×01 = 1
C = 0×00 = 0
0×04 0×83 is the type of the partition (Linux native here)
0×05 0x093f0f is the CHS address of the last sector in the partition:
S = 0x3F = 63
H = 0x0F = 15
C = 0×09 = 9
0×08 0x0000003f (63) is the logical block address of the first sector in the partition
0x0C 0×00002721 (10017 = 10080 - 63) is the size of the partition, in number of 512 byte blocks

3. Setup the loopback device. In order to do this, you need to calculate the offset (in bytes) of the first sector of your single partition. Use the following command:

$ fdisk -l -u disk.img
  Device Boot      Start         End      Blocks   Id  System
disk.img1   *          63       10079        5008+  83  Linux

This tells us that our single partition starts at the 63rd block. Hence our offset is 63 * 512 = 32256.

Finally, type:

$ losetup -o 32256 /dev/loop0 disk.img

4. Format the disk (EXT2FS)

$ mkfs.ext2 /dev/loop0

5. Mount the disk:

$ mount -o loop /dev/loop0 /mnt

6. Now, let’s install GRUB. Start by copying the necessary GRUB files:

$ mkdir -p /mnt/boot/grub
$ cp /boot/grub/stage1 /boot/grub/stage2 /mnt/boot/grub/
$ vi /mnt/boot/grub/grub.conf
   title=MyKernel
   root (hd0,0)
   kernel /mykernel

7. Unmount the device:

$ umount /mnt

8. Detach the loopback device:

$ losetup -d /dev/loop0

9. Finish up the GRUB installation:

$ grub --device-map=/dev/null
   device (hd0) disk.img
   geometry (hd0) 10 16 63
   root (hd0,0)
   setup (hd0)
   quit

10. Setup your .bochsrc file in the same directory as your disk image:

megs: 32
romimage: file=/usr/local/share/bochs/BIOS-bochs-latest, address=0xf0000
vgaromimage: file=/usr/local/share/bochs/VGABIOS-elpin-2.40
ata0-master: type=disk, path="disk.img", mode=flat, cylinders=10, heads=16, spt=63
cpu: count=1, ips=15000000
mouse: enabled=0
log: out.bochs
boot: disk

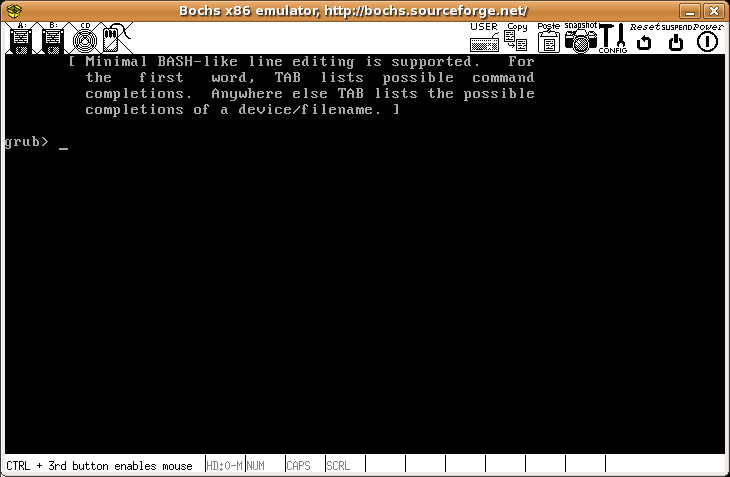
That’s it. Start Bochs and the GRUB interface should appear:

Bochs emulator showing GRUB