After coming back from attending the Fine Woodworking Live conference in New Haven, CT, and especially after talking with Fine Woodworking author and period furniture maker Steve Latta, I set out to build a Federal Card Table. I was interested in this project because it was the perfect opportunity to learn more about banding, stringing, bell flower inlays, and expand my veneering and marquetry skills. It was also an excellent opportunity to get into curved work. The fact that I also happened to like the piece helped me make the decision to dive in! After doing some research, I found 2 great magazine articles that would serve as references on how to build a federal card table:
- Federal Demilune Card Table by Steve Latta (Fine Woodworking #180)
- The Portsmouth Card Table by Mario Rodriguez (American Woodworker)
In today’s article, I will show you how I built the semi-circular apron. That part of the project is not particularly difficult, but it must be done with care since the entire table is built around the apron.
I felt compelled to write this article because, in my opinion, the aforementioned references do not present satisfactory ways of trimming the apron. I will however not cover every single detail of the construction and suggest that you purchase these magazine articles if you are interested in learning more about the entire process.
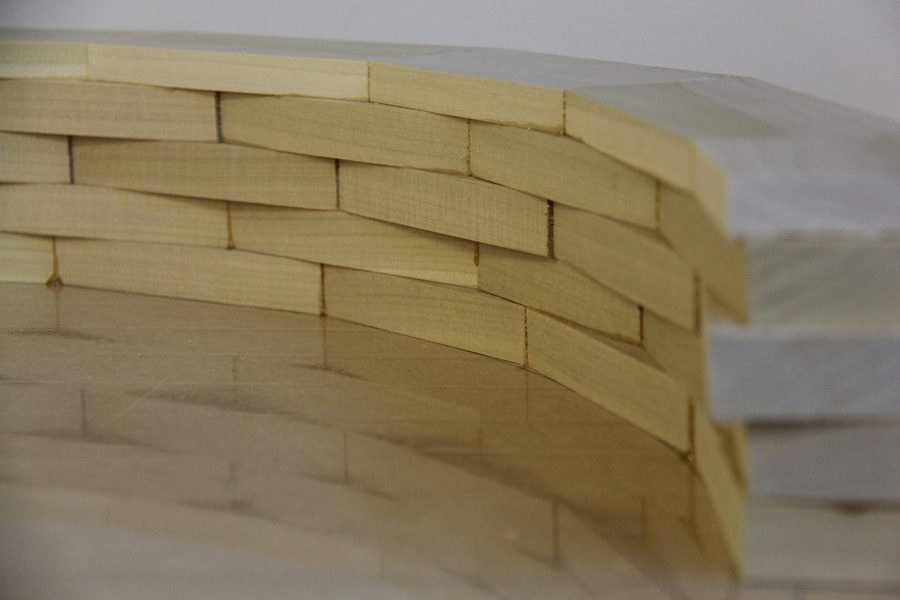
A brick wall…
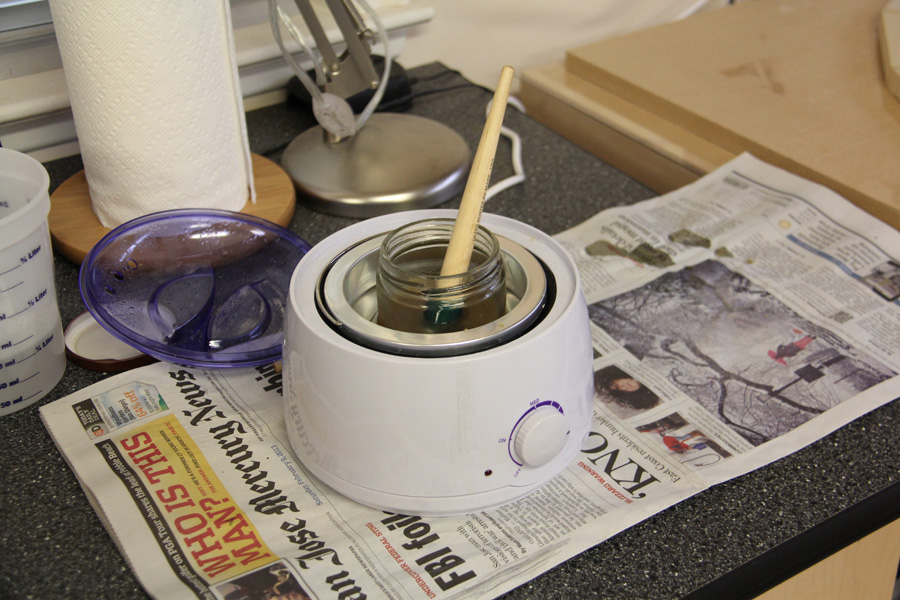
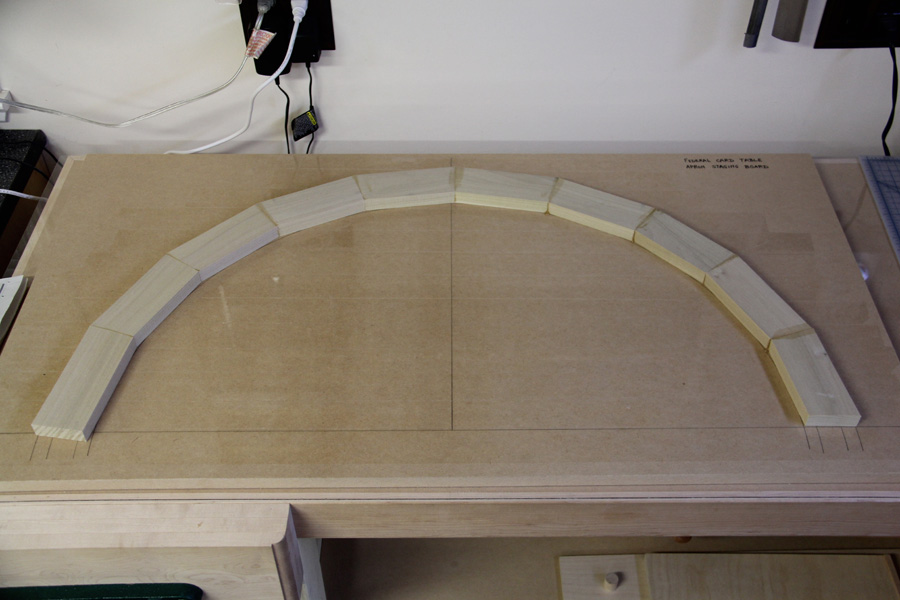
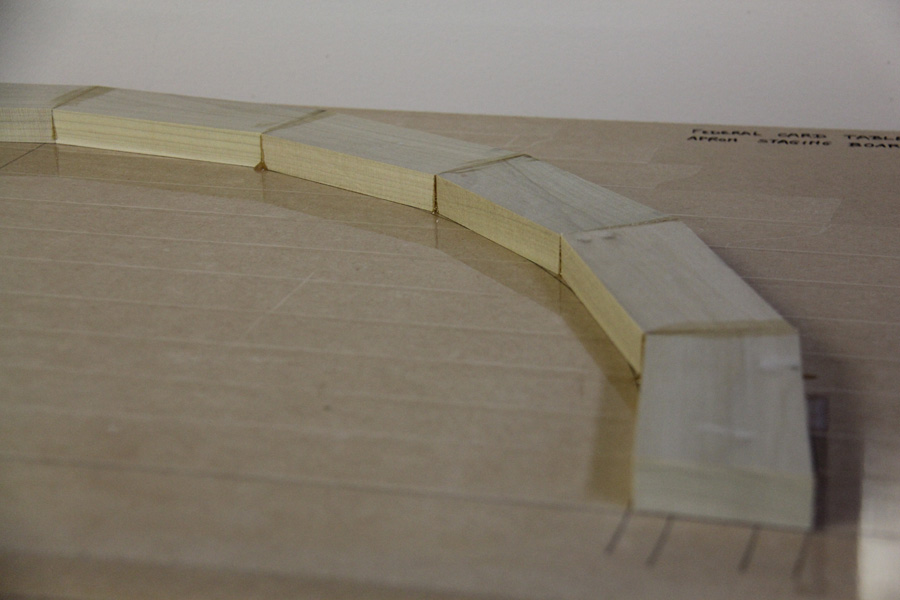
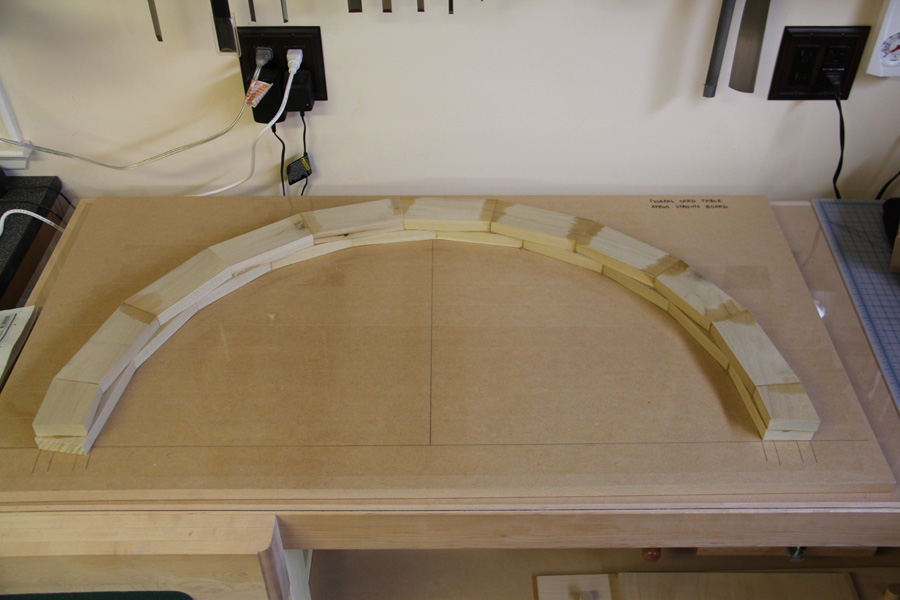
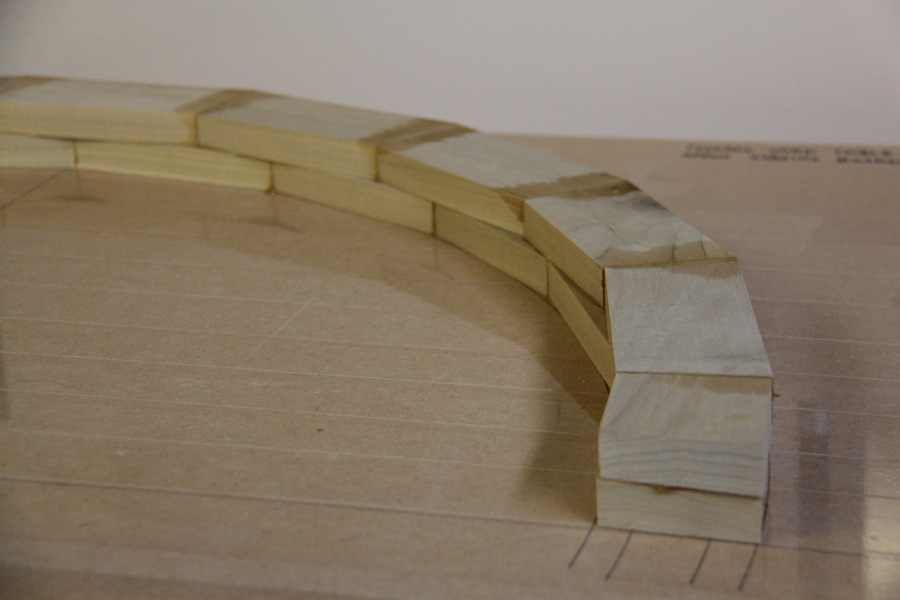
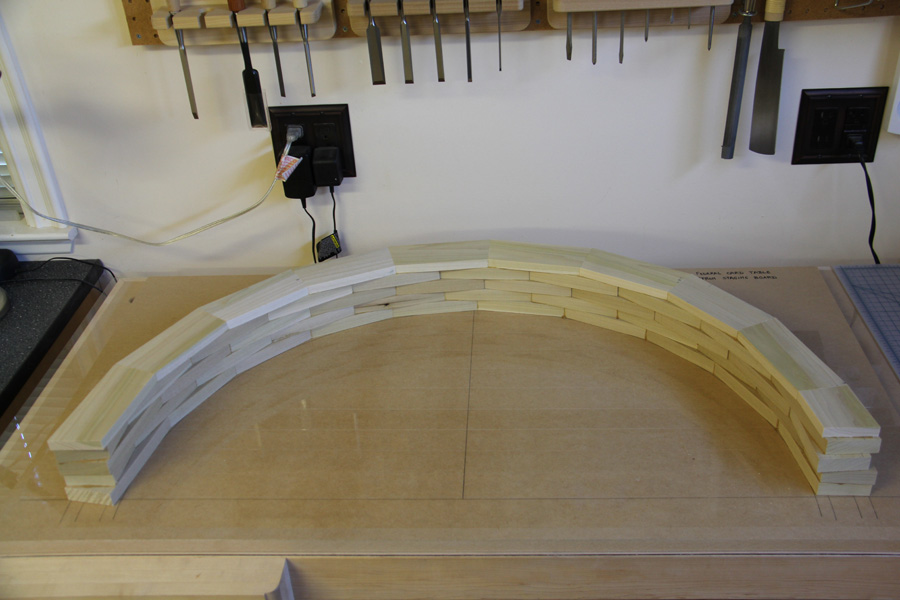
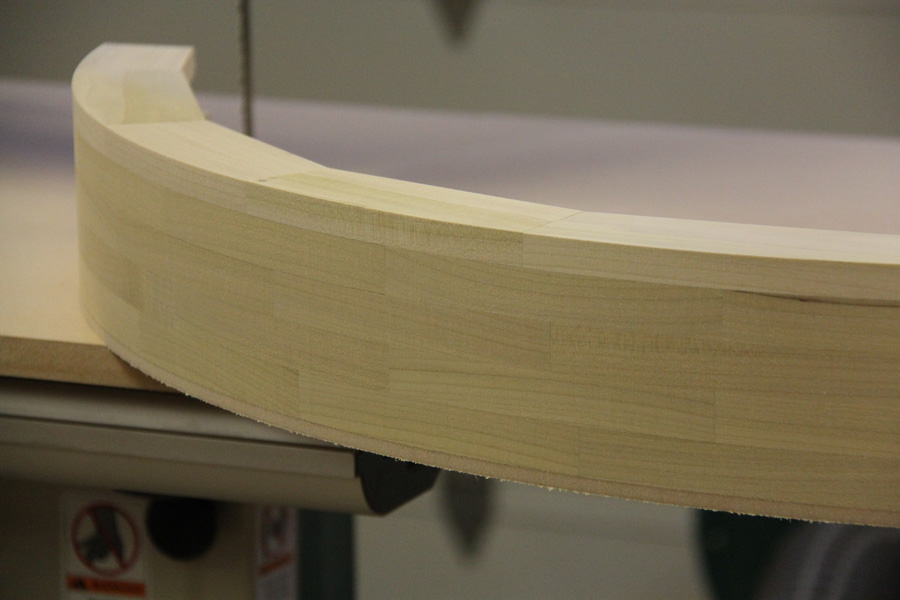
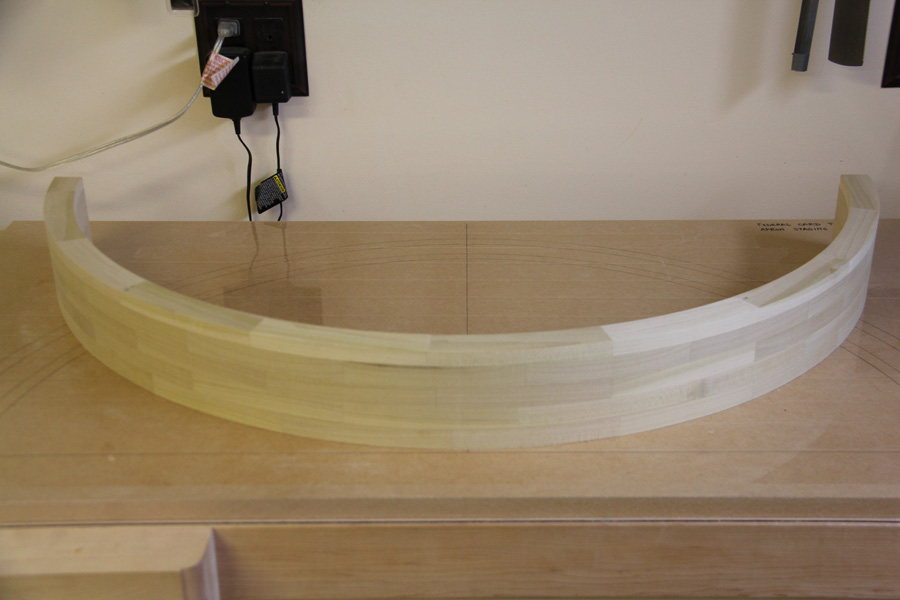
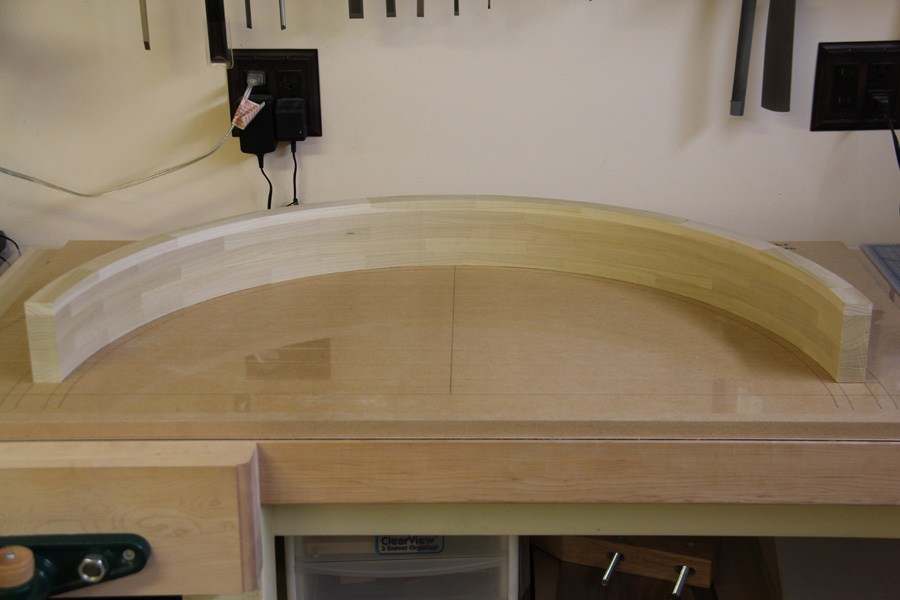
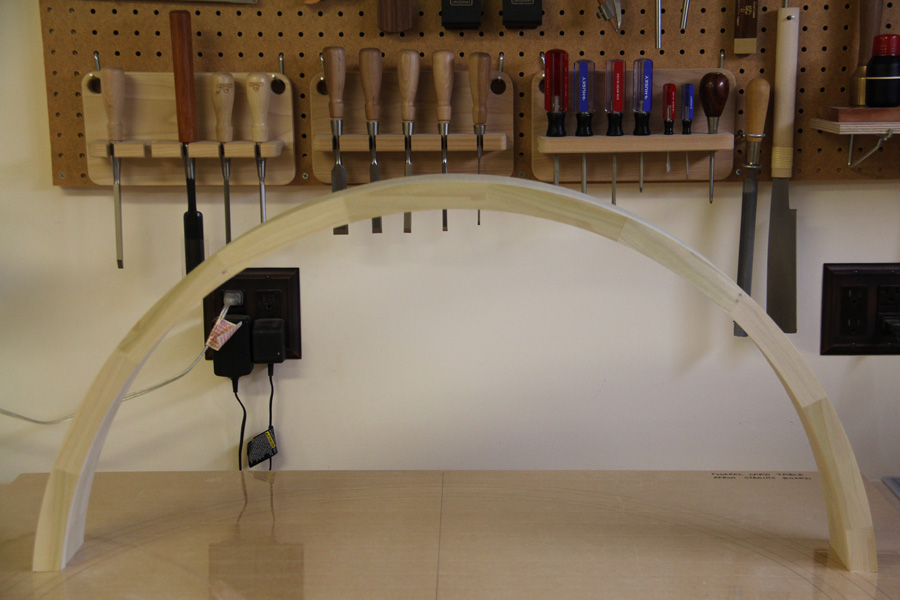
The apron of a federal card table is built very much like a masonry wall, by laying “bricks” of poplar in a semi-circular fashion on top of a staging board. To make the process easier, I used hot hide glue which requires no clamping and allowed me to work quickly. I opted to use a fairly large number of bricks in each layer (10, as suggested in Mario Rodriguez’ article) to use less material and also because I believe that the apron will be more stable that way. Each layer was left to dry over night prior to being planed in preparation for the next layer. The apron was built in 4 days.
Trimming the apron
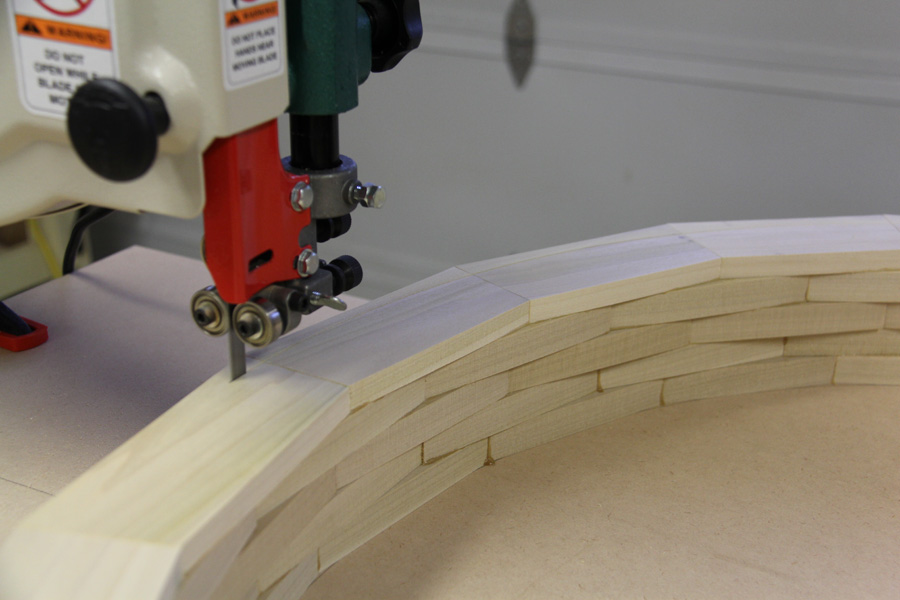
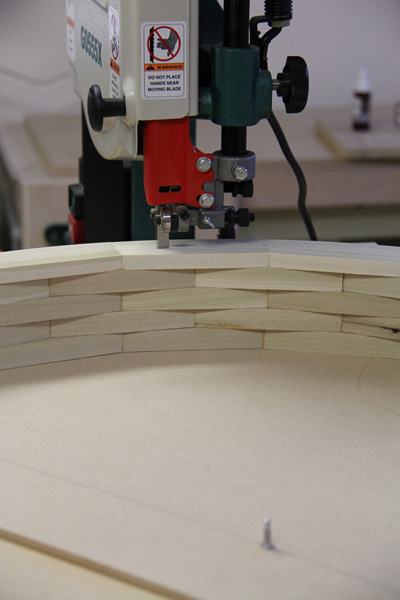
In his article, Steve Latta recommends to trim each layer using a router and an MDF template. A “climb cut” is necessary because the grain switches direction between two consecutive bricks. I first tried this technique, and I cannot recommend it. I found it to be very dangerous, even if you only have 1/16″ to trim. The router is very hard to control!
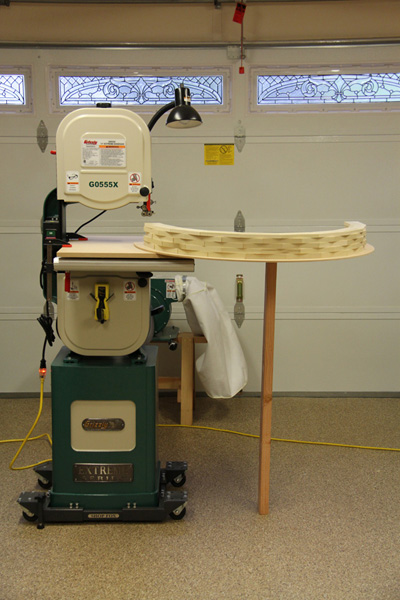
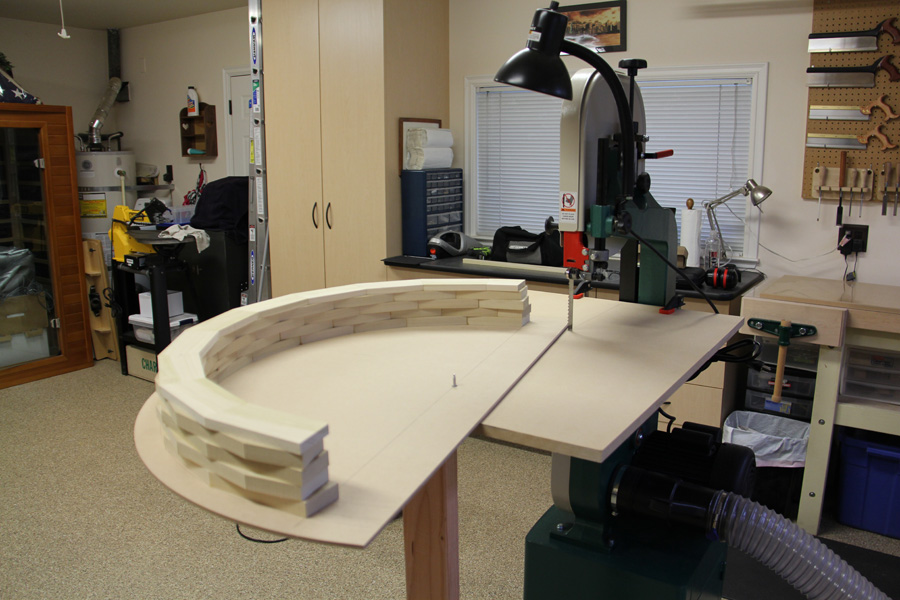
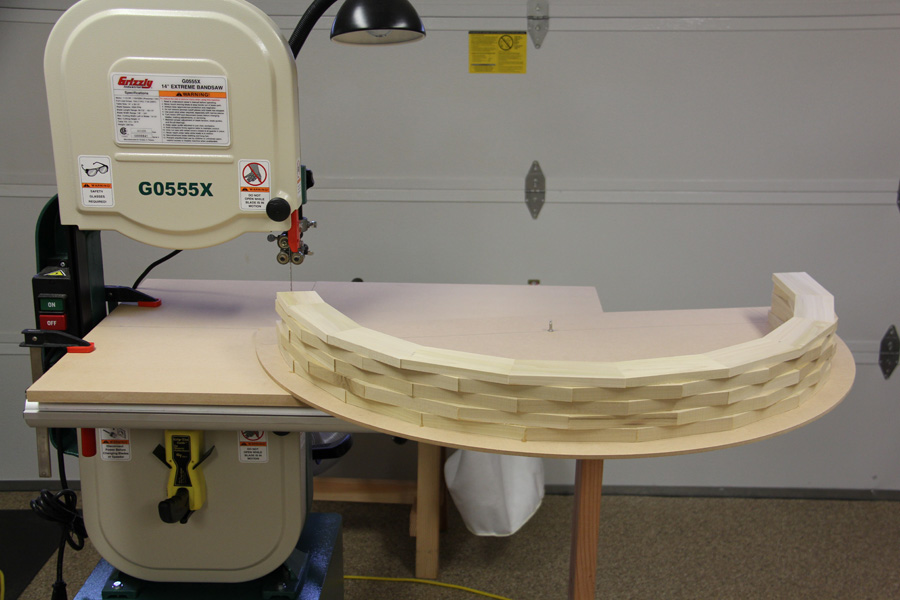
Mario Rodriguez, on the other hand, trims the apron free hand at the band saw before cleaning it up with a card scraper and/or sand paper (Needless to say that if you go that route, you will need to build an extension table for your band saw!) I like to think that I am pretty good with the band saw. Nevertheless, I think that I would not have been able to obtain a very clean cut, and I would have spent a lot of time and energy cleaning up the apron.
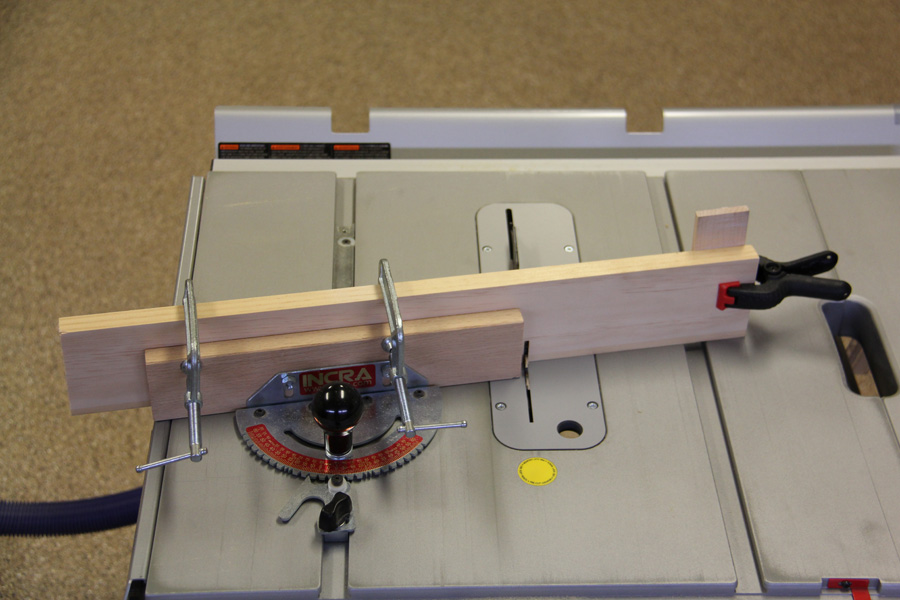
After contemplating my options, I decided to build a jig to make the task of trimming the apron at the band saw easier. It is similar to a circle cutting jig, although it can be used only once. The photos below should hopefully give you enough details about the whole process (click on the thumbnails for a larger version of each photo) The result? A perfectly cut apron which requires no clean up right out of the band saw! The 30 minutes it took to build this jig were worth the effort!
Evanna Betcher | Imarketslive | Stuart Millheiser | buy discount viagra | canadian online pharmacy reviews | Have problems with ED? Look no further because would help. | essay help forum help me write an essay to help make my evaluation significantly better
Julien- nicely done and great explanation! Looks like we have a similar setup - I’ve got a popup Ridgid tablesaw and a Grizzley 555x bandsaw - in my garage….do you have the veneer yet or will you be making it? Rusty
Hey, Rusty! Good to hear from you :) I have not picked the veneer yet. I will probably follow Mario Rodriguez advice and do all the veneering work on a flat surface, resaw and then glue to the apron. I also need to come up with a design for the marquetry that will be on the apron… As I told you back at FWW Live, this project is going to keep me busy for a very long time! :) The next step is to dovetail the back of the apron. Cheers! Julien (PS: I checked out your site, you’ve got a lot of nice pieces there!)
Julien- thanks….I certainly haven’t worked up to a Federal card table. I have attended a couple of classes at the Philadelphia Furniture Workshop with Mario - what a great guy and a great teacher. You should come this way sometime for one and we’ll connect - Philly is a great food town and lots of furniture history….